

Hardware components | ||||||
| × | 1 | ||||
 |
| × | 1 | |||
 |
| × | 1 | |||
 |
| × | 1 | |||
Software apps and online services | ||||||
 |
| |||||
Ameba RTL8722DM
Read moreAmeba RTL8722DM is a low-power dual-band WLAN and BLE(Bluetooth Low Energy) SoC by Realtek. The RTL8722DM also include memory for Wi-Fi protocol functions and application making it simple for anyone to develop various kind of IoT applications. At the same time it has a wide range of peripheral interfaces. With all these interfaces, it can connect to most of the electronics components like LEDs, temperature and humidity sensors, and so on.
In this project, the RTL8722DM will be used to create a web server that can be accessed with any devices that connect to the internet with the IP address.
If you need additional technical documents or the source code for this project. Please visit the official websites and join the Facebook group and forum.
- Ameba Official Website: https://www.amebaiot.com/en/
- Ameba Facebook Group: https://www.facebook.com/groups/amebaioten
- Ameba Forum: https://forum.amebaiot.com/
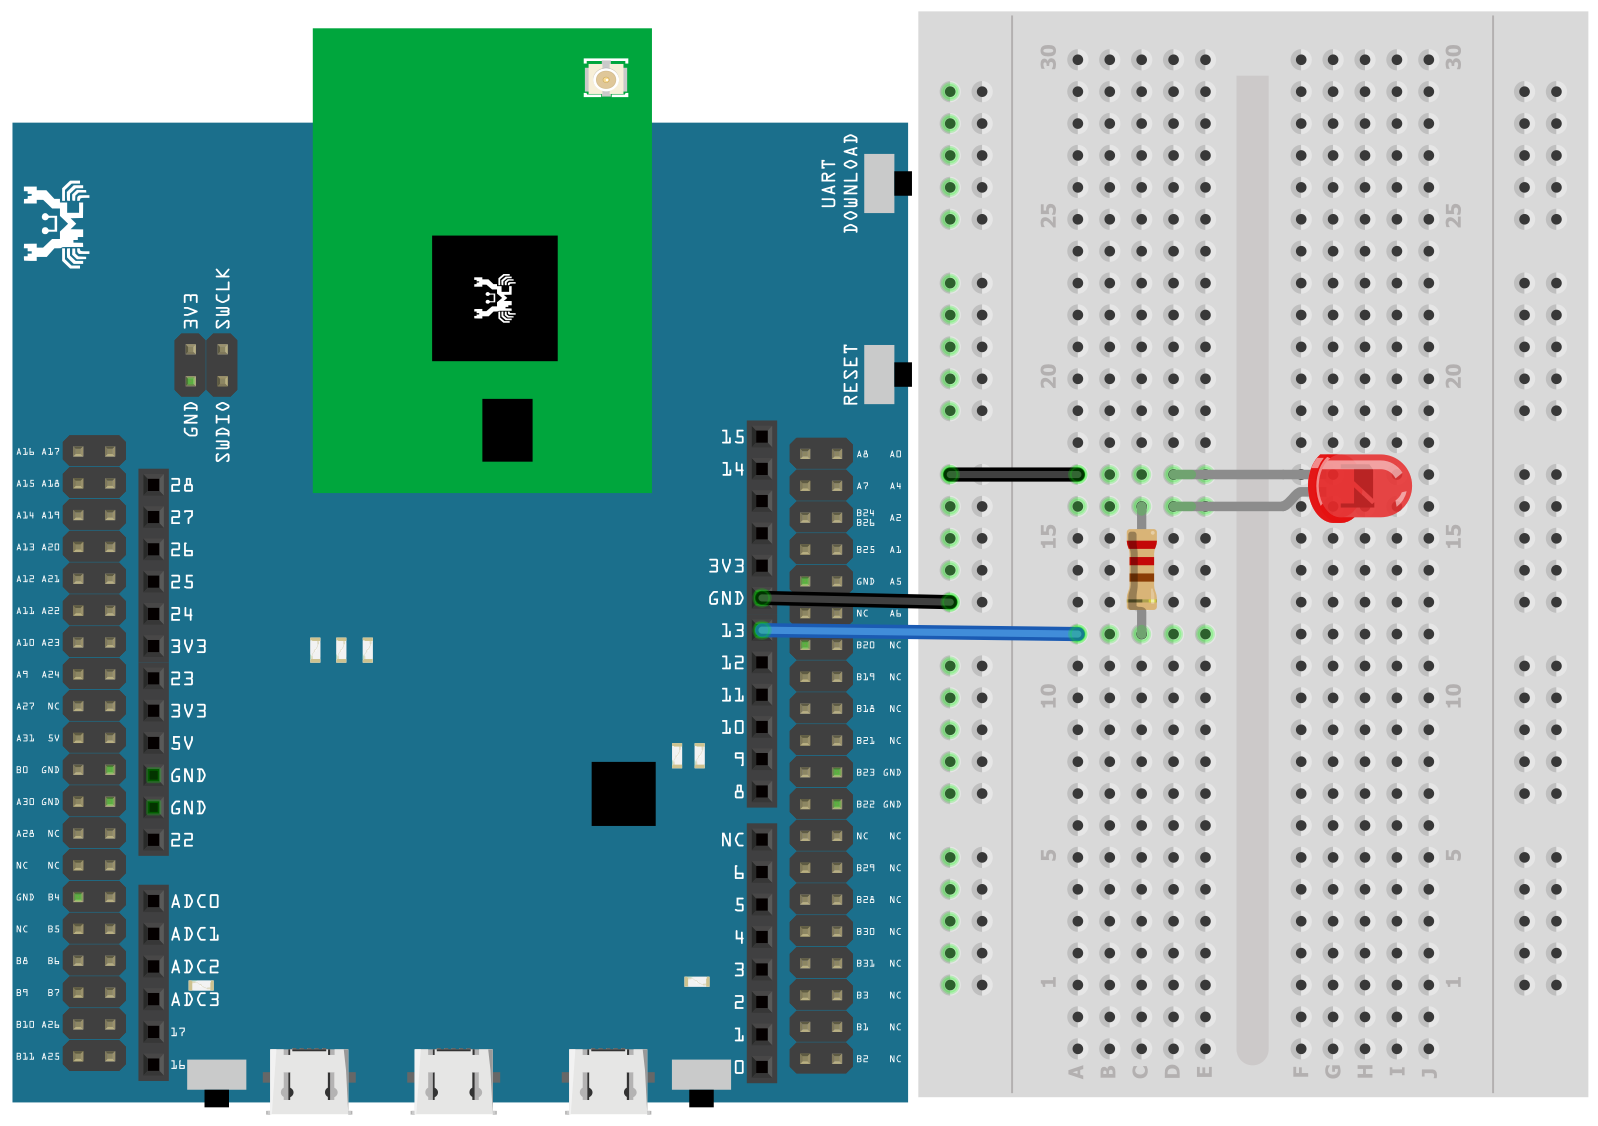
Wiring Diagram
First, connect the breadboard to the Ameba.
Then, connect the LED and the resistor in as shown in the wiring diagram.
For the LED, the longer pin is the positive pole while the shorter pin is the negative pole. Therefore, connect the shorter pin to the GND and the longer pin to D13 on the Ameba. In addition, to limit the current through the LED and prevent it from damage, we have to connect a resistor to the positive pole.
Programming
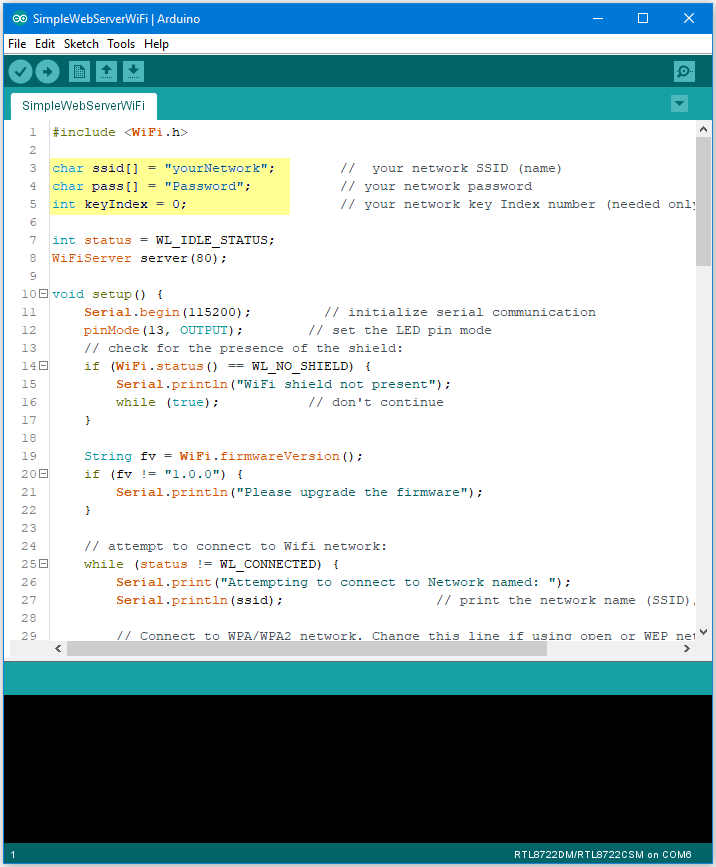
To open the sample code in the Arduino IDE, Open "File" -> "Example" -> "AmebaHttp" -> "SimpleHttpExample"

Programming
Next, in the sample code, modify the highlighted section to enter the information required (SSID, PASSWORD) of your network to connect to your Wi-Fi.
Programming
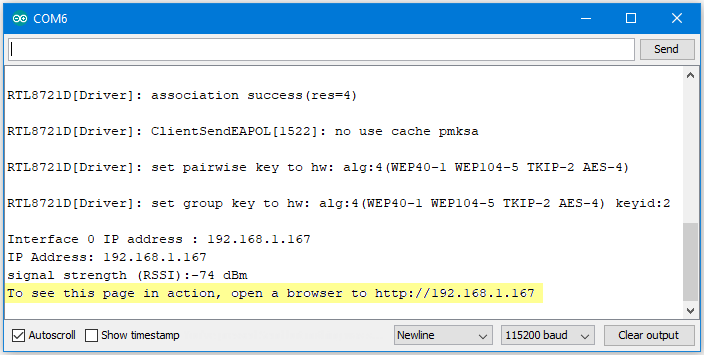
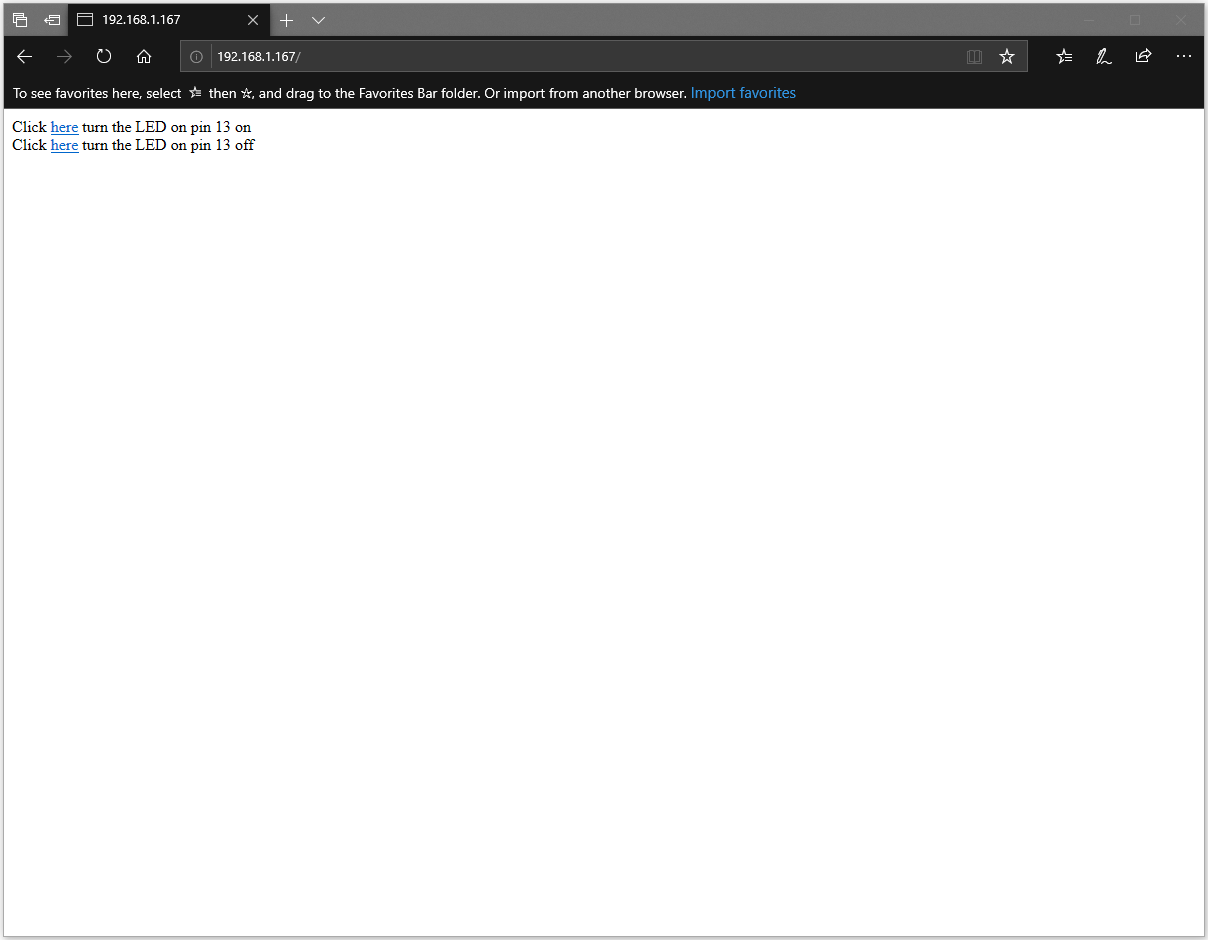
Once the upload is completed, open the serial monitor in the Arduino IDE. When the connection is established, you will see the message "To see this page in action, open a browser to http://xxx.xxx.xxx.xxx" in the Arduino IDE, as shown in the picture


Comments