First of all we will have to prepare our parts. We will start that by soldering jumper wires to our DC gear motor
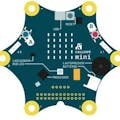
And female pin headers to the Calliope mini, so we can user the motor driver that is located on the board.
Also, the servo motor must be prepared. We will use the servo as an continuous gear motor. You can directly buy continuous servos online, but I just used a cheap SG90 9g servo and modified it to function like a continuous servo. You can find a tutorial how to do this here.
When the servo is modified, we will cut off the female headers and solder male headers to the power wires.
Now that we are done with preparing the parts, we can start building the actual vehicle.
First, we will glue the DC motor to the battery case like shown in the picture. Make sure that you seal the battery case, otherwise you won't be able to change the batteries later.
Now we will attach the servo to the other end of the battery pack.
And the Calliope mini to the top.
It should now look something like this:
For the servo motor, I printed my own wheel. If you have a 3D printer, you can get the files here. Otherwise you can build your own from cardboard.
Just cut out a relatively thick cardboard circle with an diameter of 5cm and hot glue it to one of the servo levers that are shipped with the servo. Then tighten a rubber band on the outside of the wheel to give it some grip.
Now that the vehicle is build we can wire it up.
Just plug the two motor wires into the motor driver headers A and B.
I attached the servo power wires to the V+ and GND on the driver aswell. This is not recommended because a lot of current is flowing over the Calliope mini itself. The strength of the motors is low too because the voltage drops when it flows through the mini. This can potentially break your Mini. I recommend attaching a parallel power source to the servo power wires at V+ and GND. That way no current flows directly through the mini to the motors.
CodingNow that the vehicle is built, we need to program it.
First, I programmed the remote.
The remote constantly sends the current button status of the remote control.
Now we can decide how to process this data in the receiver.
This is just an example code, that lets you control the vehicle. I recommend you to try programming it yourself.
And we're done!


Comments