


Hardware components | ||||||
_ztBMuBhMHo.jpg?auto=compress%2Cformat&w=48&h=48&fit=fill&bg=ffffff) |
| × | 1 | |||
 |
| × | 1 | |||
 |
| × | 1 | |||
 |
| × | 3 | |||
Software apps and online services | ||||||
 |
| |||||
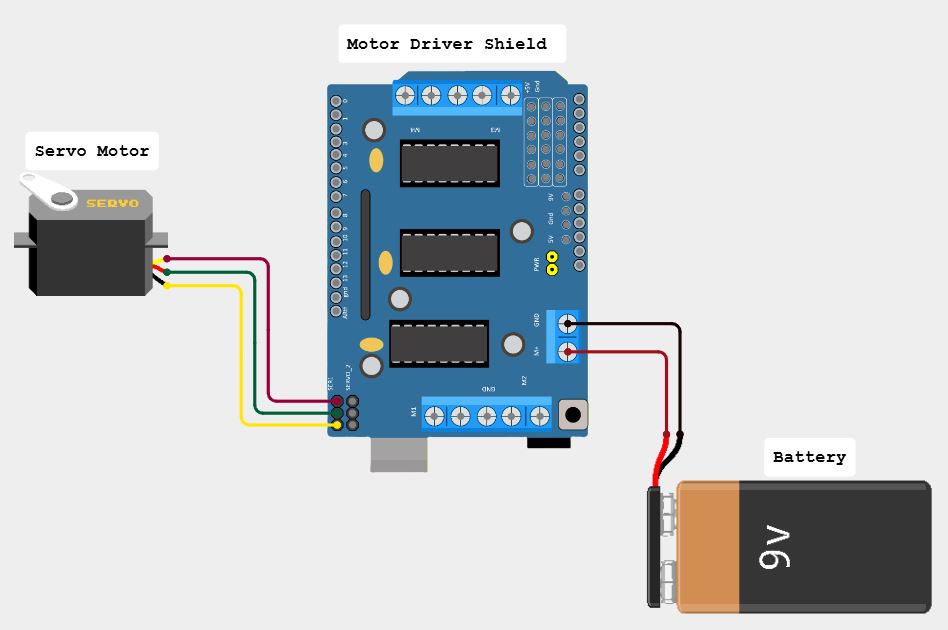
In this project, we used an L293D Motor Driver Shield to control the direction and angle of a servo motor. This project is perfect for beginners interested in robotics and automation. Whether you're planning to create a future robotics endeavor or just exploring, this project is a great starting point.
Wiring Diagram1. Motor Driver Shield Servo Motor
Connect the signal wire, the power wire, and the ground wire of the servo motor to the SER1 or SERVO_2 pins on the motor driver shield. The servo motor has 3 wires, which makes it compatible with these pins.
2. Power Supply
Connect the battery pack to the power input terminals on the motor driver shield.
3. Arduino Uno
Plug the L293D motor driver shield directly onto the Arduino Uno.
Explanation- Servo Control: The
Servolibrary is used to control the servo motor. - Angle Control: The
myServo.write(angle)function sets the servo motor to a specific angle (0 to 180 degrees). - Timing: The
delay()function is used to hold the servo position for a specific amount of time.

13 projects • 4 followers
AI Convergence Engineering, Software Engineering, ML, deep learning, image processing, computer vision, circuit design, and Edge AI devices.


Comments