


Hardware components | ||||||
 |
| × | 1 | |||
_ztBMuBhMHo.jpg?auto=compress%2Cformat&w=48&h=48&fit=fill&bg=ffffff) |
| × | 1 | |||
 |
| × | 1 | |||
| × | 4 | ||||
 |
| × | 2 | |||
 |
| × | 1 | |||
 |
| × | 1 | |||
 |
| × | 1 | |||
Software apps and online services | ||||||
 |
| |||||
| ||||||
Hand tools and fabrication machines | ||||||
| ||||||
1. Detailed Project Description
This project demonstrates the design and implementation of a simple digital keyboard with sound output, using an Arduino microcontroller, a piezo buzzer, and four tactile push buttons. The main objective of the exercise is to build a small musical instrument that generates different tones depending on which button is pressed. This approach allows beginners to understand the concepts of analog signal reading, sound generation, and user interaction with microcontrollers in a very practical and engaging way.
2. How the System Works
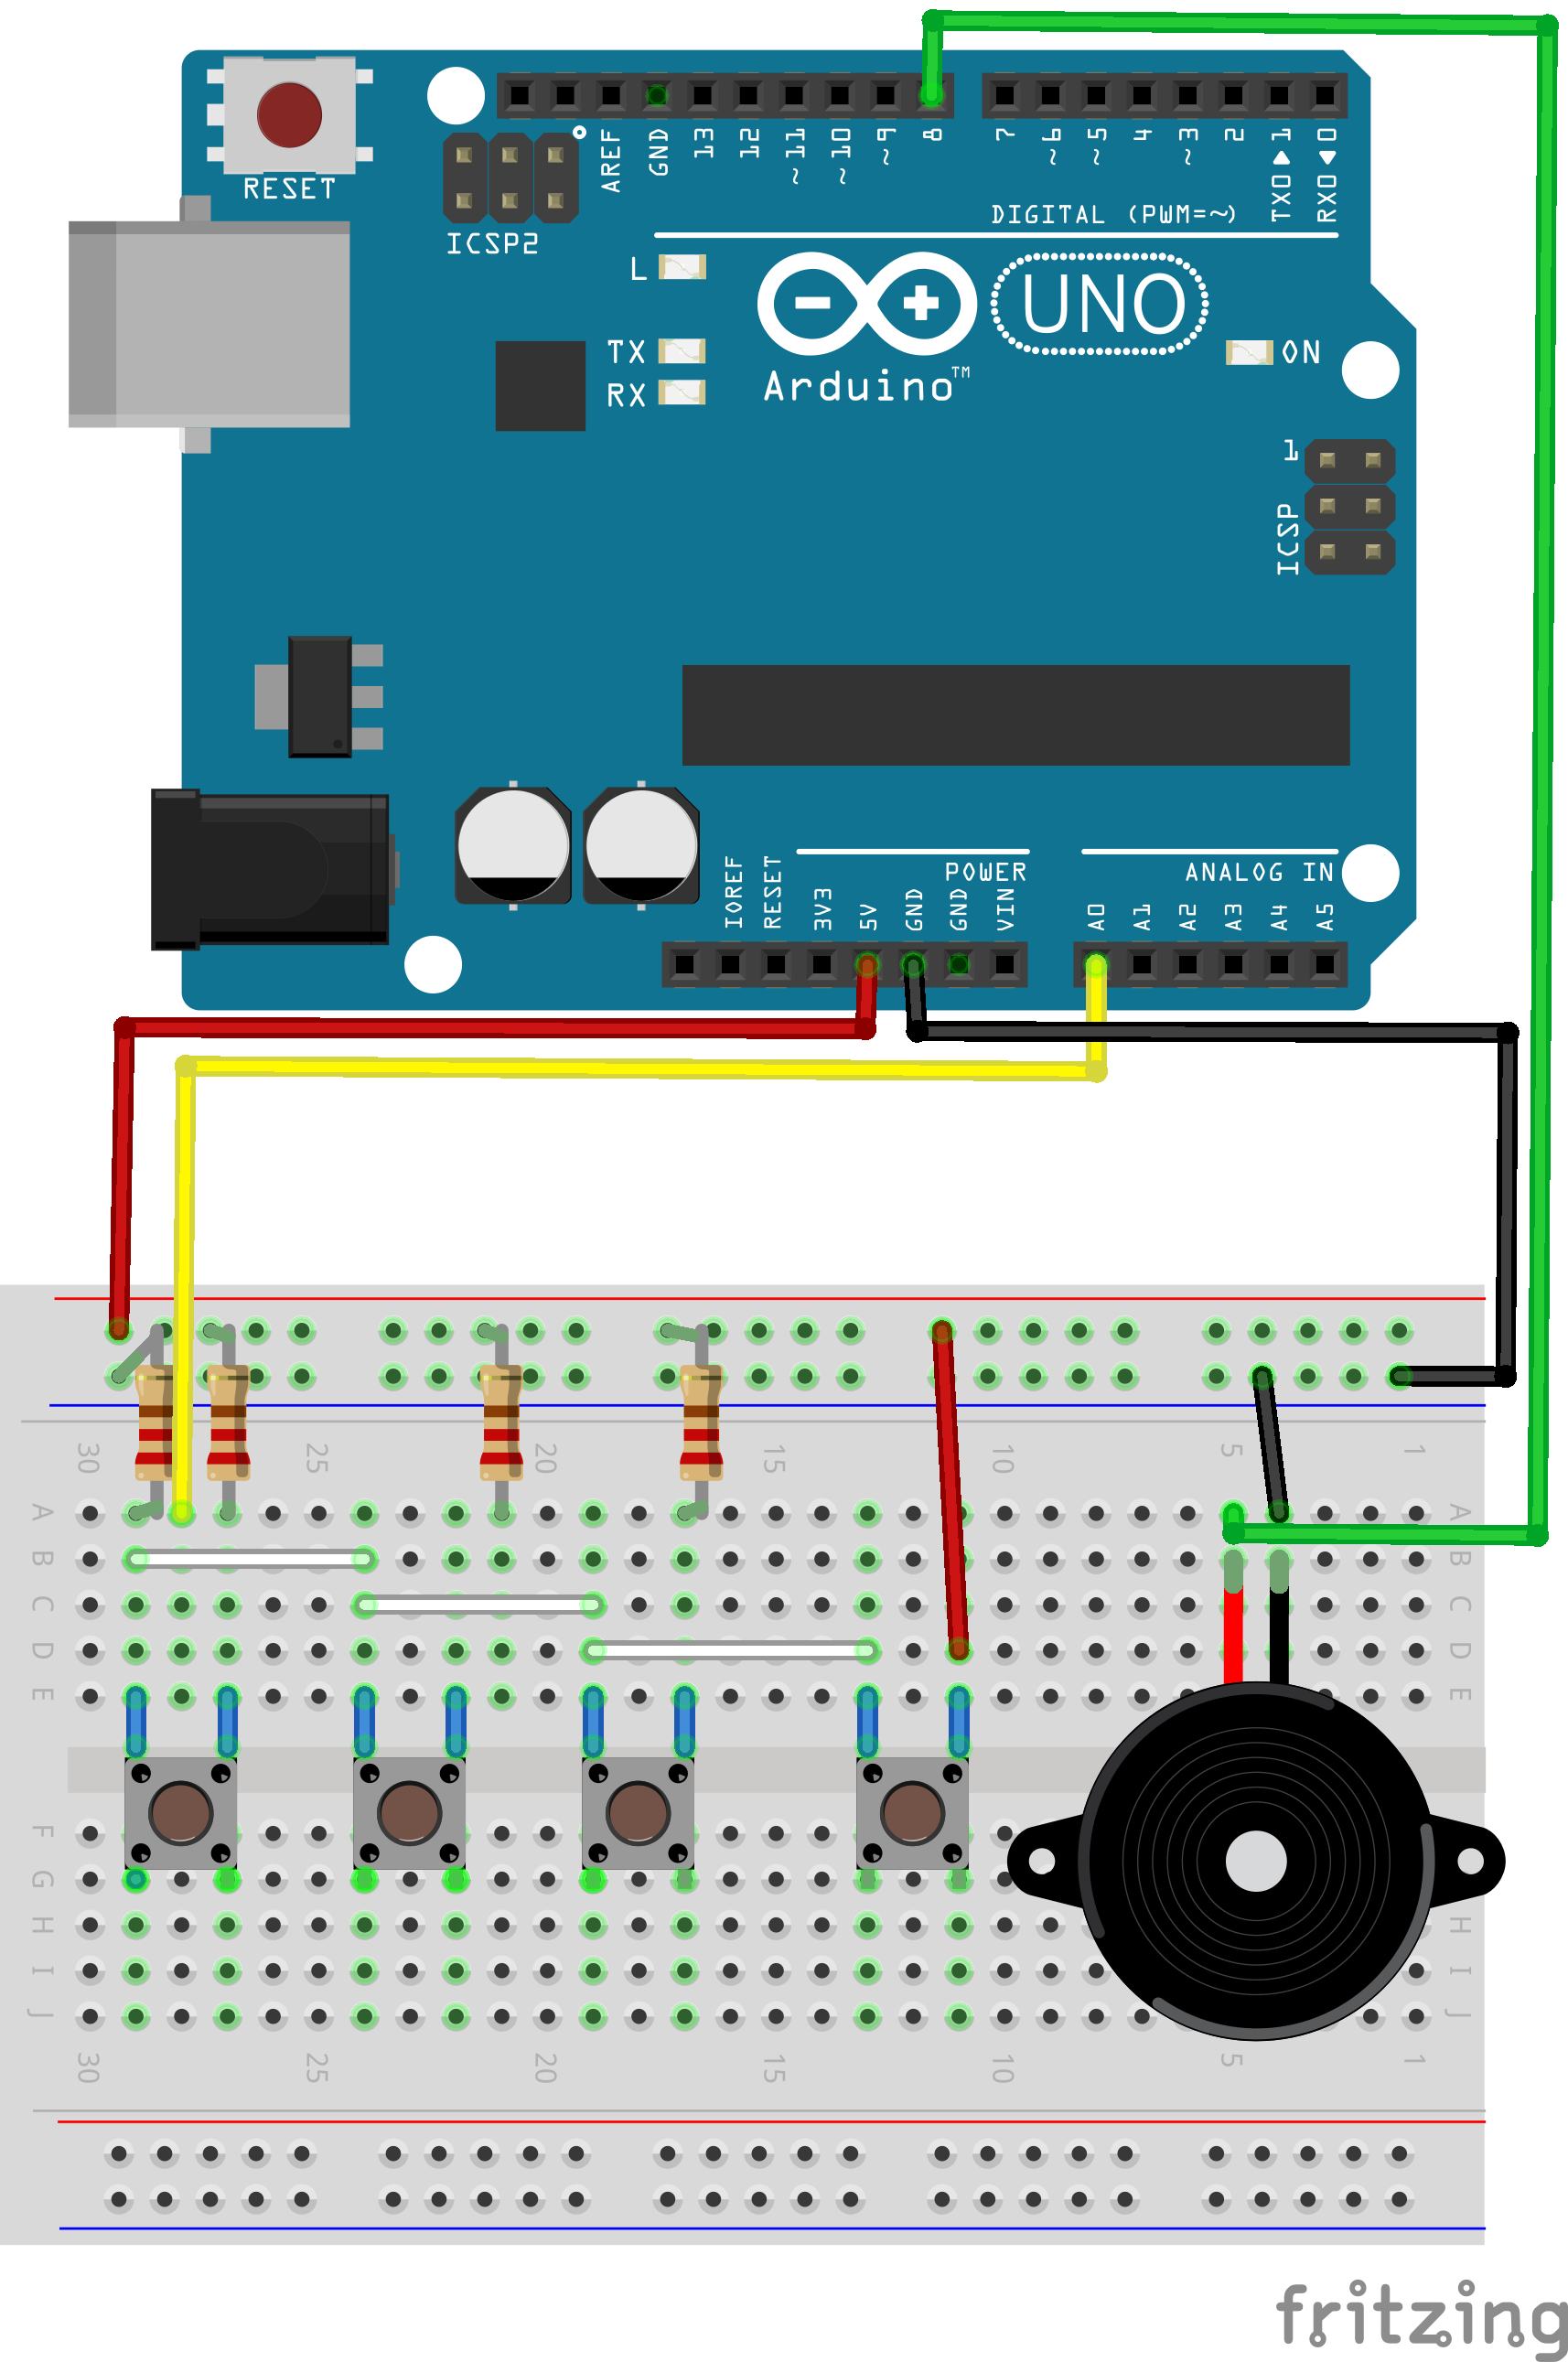
The push buttons are connected to the Arduino through resistors, which form a voltage divider network. Each button produces a different voltage level when pressed, and this voltage is read by the Arduino’s analog input pin (A0). Depending on the analog value detected, the Arduino determines which button has been pressed and triggers the corresponding frequency on the piezo buzzer.
The buzzer is connected to a digital output pin (pin 8), and when a note is selected, the Arduino uses the tone() function to play the correct frequency. When no button is pressed, the noTone() function is called, stopping any sound output.
3. Circuit Description
• Arduino Board (Uno or Mega): The central controller that reads the analog signals and produces sound output.
• Breadboard: Used for prototyping the circuit without soldering.
• Four Push Buttons: Each button is assigned to a specific note (e.g., C, D, E, F).
• Resistors (10kΩ, 1MΩ, 330Ω): Used as pull-down resistors and to create distinct voltage levels for each button.
• Piezo Buzzer: Outputs the generated tones based on the pressed button.
• Jumper Wires: For connecting all components.
• USB Cable and Computer: For powering and programming the Arduino.
4. Software Implementation
The program reads the analog input value from pin A0 and uses conditional checks to map each range of values to a specific frequency. A small array of notes {262, 294, 330, 349} corresponds to the frequencies of common musical tones. When a button is pressed, the program selects the correct note from the array and sends it to the buzzer.
This method is efficient because only one analog pin is required to handle multiple buttons, instead of using one digital pin per button. It introduces students to the concept of analog multiplexing and voltage division to expand input capabilities.
5. Educational Value
Through this project, students learn:
• How to read and interpret analog signals with Arduino.
• How to use conditional logic to trigger different outputs.
• How to generate sound and tones using the tone() function.
• The importance of resistors in controlling voltage and current in circuits.
• The process of designing an interactive prototype that responds to user input.
6. Conclusion
This simple digital keyboard project successfully demonstrates how microcontrollers can be used to create interactive electronic systems. By pressing the buttons, different musical notes are generated, providing both a fun and educational experience. Exercise is highly valuable for beginners in electronics and programming, as it combines theory with practice and encourages creativity in building new musical or interactive systems with Arduino.


Comments